Guidelines for soil sampling
See the guide to accurate soil sampling flyer for a quick introduction.
By following these guidelines, you will have reliable information for making those expensive fertiliser decisions.
Soil testing helps you:
- decide your fertiliser needs
- monitor soil acidity and liming needs
- work out why some areas of your farm are less productive than others
- budget and plan for farm nutrition.
For soil testing to give reliable results, you need to:
- have suitable and consistent sampling tools
- collect a representative sample from each paddock or area within a paddock
- have the sample analysed at an accredited laboratory
- have the laboratory results interpreted by an adviser, preferably a Fertcare-accredited adviser
- have a paddock record system to track paddock tests over time.
For consistent, long-term results:
- sample at the same time of the year
- sample using the same sampling method
- sample in the same areas
- use the same sampling tool
- send your samples to the same laboratory
- sample at least every 3 years, or more frequently if soils are sandy or there is high nutrient removal in products.
All samples should:
- be a consistent depth and representative
- contain 30–40 individual cores
- be at least 30m apart.
Soil sampling kits
You can buy prepared soil sampling kits from a number of manufacturers. These kits are available from most rural suppliers. If you use a soil sampling kit supplied by a fertiliser company, read the instructions supplied carefully because they may have specific sampling instructions.
Collecting soil samples
Paddocks smaller than 10ha
One sample of 30–40 individual cores should be enough for paddocks smaller than about 10 hectares (ha) with reasonably uniform soil.
Paddocks larger than 10ha
Collect 1 sample (of 30–40 individual cores) for every 10ha of larger paddocks, even if the soil type appears relatively uniform.
Different soil types
Collect a sample from each management area of different soil types within a paddock, and have them analysed separately.
Soil testing can be a waste of time and money if samples collected are not representative of the area. The top 10cm of soil over a hectare contains about 1300 tonnes of soil, so a 100 gram subsample from a 10ha paddock represents only 1 part in 130 million! Short cuts in sampling, such as taking only 1 or 2 cores, or only a handful or spadeful of soil, will give misleading and costly results.
How deep to sample
The standard depth for soil sampling pastures in Western Australia is 10cm. Soil testing standards and critical nutrient levels in WA have been based on this sampling depth.
In high rainfall pastures, the concentration of nutrients in the soil decreases rapidly with depth. Sampling to less than 10cm will give a higher reading, and sampling to deeper than 10cm will give a lower reading. Basing decisions on shallow or deep sampling will result in lost production or wasted money.
Sampling deeper into the soil profile for other soil constraints — such as subsoil acidity — requires a different sampling technique and program. See Diagnosing soil acidity for more information.
Sampling tools
Manual pogo stick
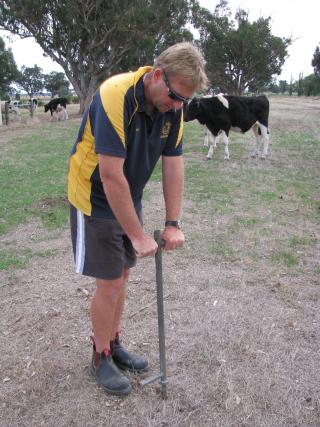
Traditionally, samples have been collected by walking across the paddock with a sampling tube or ‘pogo stick’ which is pushed into the ground at the selected spot and the core tipped into a bucket or plastic bag by tilting the sampler upside down. If the soil is loose, tilt the sampler towards horizontal while it is still in the ground to avoid losing soil from the bottom of the tube.
Guidelines:
- Do not kick the surface before sampling because results will be artificially low.
- Keep a consistent depth; a heavy person will sample deeper than a lighter person.
- Check the tube regularly for blockages.
Hand-held sampling machines
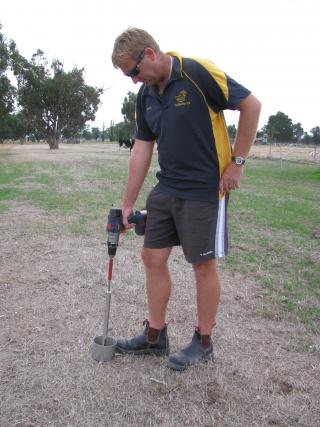
Hard soils can be sampled more easily using a drill-mounted soil sampler.
Guidelines:
- Take care to keep the sampling depth to 10cm.
- Keep the sampler upright and still.
- Remove the sample immediately after the hole is fully drilled; this avoids taking too much sample from the walls of the hole and from near the top.
Mechanised samplers
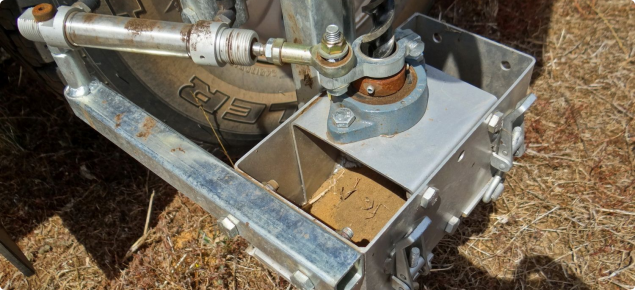
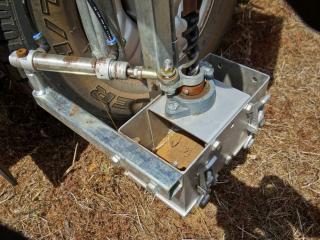
Mechanised sampling equipment makes soil sampling easier and quicker. Contractors are more likely to use this equipment because of the higher cost of labour. The equipment must consistently sample to 10cm. If you do change to using a contractor, be aware that your sample results may change slightly from previous sampling.
Sampling tools that you should not use
Do not use a shovel or trowel. If the individual sample cores are collected into a bucket, make sure that the bucket is clean and completely emptied between samples.
Sampling pattern
There is no one ‘correct’ sampling pattern but, once you select a sampling pattern, stick to it. The same pattern should be used when collecting samples for plant tissue testing.
There are 3 options for sampling pattern:
- Fixed transect across a paddock: start in one corner of the paddock and walk in a straight line to the diagonally opposite corner, collecting 30–40 sample cores on the way. Ear tags or wooden stakes can be fixed to fences to mark a transect and it can be marked on your paddock map so that you sample along the same transect each year.
- Zig-zag across a paddock: start in one corner of a paddock and zig-zag across it to the diagonally opposite corner, collecting 30–40 sample cores on the way. It is difficult to sample along precisely the same zig-zag transect each year.
- Fixed points in a paddock: select reference points in the paddock or record GPS coordinates so you can locate them in future years and collect a number of samples within a set distance of that point, for example 5–10m. You need to have enough points to give you a total of 30–40 cores for the paddock. Sampling contractors should be able to supply GPS points on a map showing where the cores were taken.
Avoid:
- areas where livestock have been congregating – trees, water troughs and gates in particular
- areas where fertiliser, lime or hay have been dumped in the past 1–2 years
- dung and obvious urine patches; this is particularly important when using mechanical systems linked to GPS – do not just collect the sample where the machine says you should without taking a closer look
- sampling within 3 months of fertilising; if this is unavoidable, increase the number of cores to at least 60.
When to sample
Non-irrigated pastures should be sampled from late-December through to March. If you are sampling by hand, soils which set hard when dry should be sampled before they dry completely. Sampling at the same time each year will reduce some of the variation inherent in soil testing.
Irrigated pastures should be sampled in early spring, generally when the soil has dried enough to make sampling possible, and at least 4 weeks after the last application of phosphorus or potassium fertiliser.
Planning and recordkeeping
Store your soil and tissue testing records in a form that allows you or your adviser to retrieve them easily. Common options are apps for mobile devices and computer spreadsheets or databases. The better ones of these will link to a paddock mapping program which will download the laboratory results without having to enter them manually.
Once you have accumulated records over a few years, it will be more obvious when an unexpected figure turns up and retesting may be indicated.
Mapping of paddock details and soil test results improves management information:
- Prepare a map showing all the areas to be sampled and assign each a permanent number to use each time the paddock is sampled.
- Mark features on the map that could indicate areas that should be sampled separately, such as slopes, watercourses, previous paddock boundaries, areas of reduced yield.
- For each paddock, maintain a record of the crops grown each year, the results of previous soil tests and the amount of fertiliser applied.
- Note the location of samples and fertiliser pattern in your records.
Where to send the samples
Send your soil samples for testing to an accredited laboratory – accredited by the Australasian Soil and Plant Analysis Council (ASPAC), and using the analytical methods appropriate for WA soils.
Most farmers in WA send soil samples to one of the major fertiliser companies that test at their own laboratories.
You can engage an independent or Fertcare-accredited adviser to interpret the soil test results and recommend fertiliser types and rates.
Tissue test to supplement soil tests
Soil testing is used to help estimate major fertiliser requirements and tissue testing can be used to monitor and provide feedback to the fertiliser program.
Tissue testing can check:
- how well the estimate was made
- if the pasture is able to take up the nutrients
- nutrient levels not suited to soil testing, such as micronutrients.
For more information, refer to the 'See also' links to the right of this page, or the contacts below.

