
Equipment needed for a chicken necropsy
- standard post-mortem kit including scalpel, forceps, scissors
- secateurs
- dry swabs, jars for individual fresh samples and pooled formalin fixed tissues
- swabs in media for bacterial culture
- 0.5 millilitre (mL) sterile saline (drip fluid) or viral transport media (VTM).
Skin and feathers removed displaying:
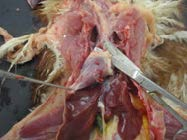
Coelomic musculature
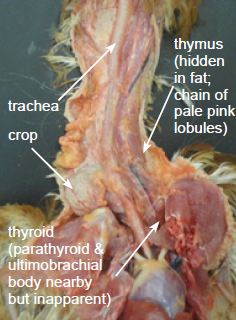
Neck and cranial coelom
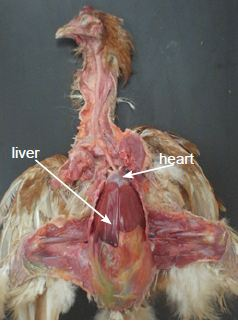
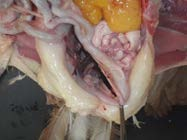
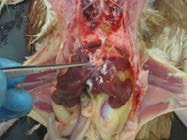
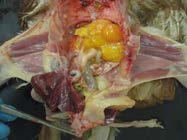
Coelomic cavity
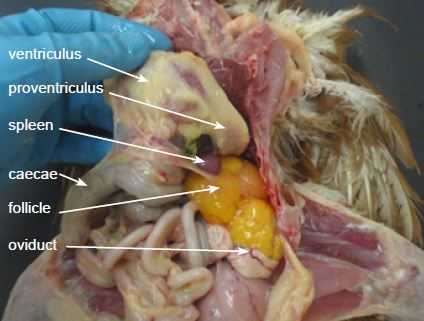
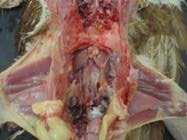
Coelomic cavity with gastrointestinal tract reflected
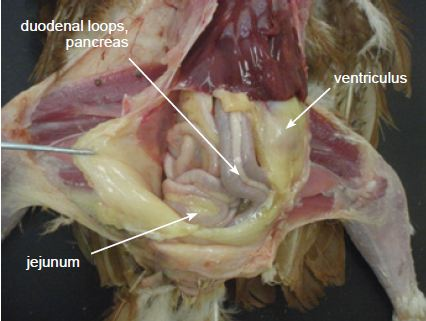
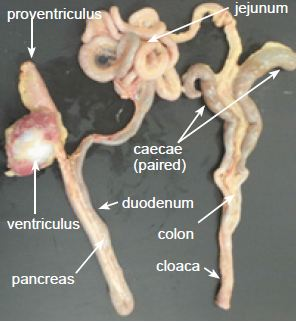
Gastrointestinal tract anatomy
External examination
Use dry swabs to firmly swab the cloaca and trachea mucosa, then snap swab heads into separate viral transport media (VTM) or saline for avian influenza and Newcastle disease virus testing. (VTM is available from AHL or district veterinary officers.)
Examine the feathers, skin and limbs. Use sticky tape to collect mites and tape to a microscope slide for identification. Take skin scrapes of crusting lesions to reveal mites.
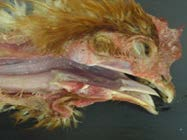
Collect a tracheal swab

A scissor cut at the corners of the mouth helps expose the trachea.
Collect a cloacal swab

Post-mortem approach
1. Pluck the feathers from the dorsum and ventrum

Check for trauma, dog bites and dermatitis.
2. Disarticulate the leg

Reflect the legs laterally by incising ventral thigh and disarticulating the femoral head.
3. Expose the pectoral muscle

Reflect or remove the coelomic skin cranially over the sternum and up to the neck to the intermandibular space.
4. Visualise the air sacs while removing keel/pectoral muscle
Cut the ribs from the lateral chest and the clavicle and coracoids bones at the thoracic inlet. Lift the keel and pectoral muscles to expose the air sacs. Check the air sacs – they should be clear/cling film like. Opacity in the air sacs may be airsacculitis.
5. Remove the sternum

6. Reflect the coelomic musculature

Reveal the gastrointestinal tract. If fibrinous exudate is present in the coelom or air sacs, a swab should be placed into bacterial transport media.
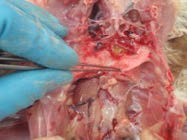
7. Visualise the bursa in dorsal cloacal wall
Reflect the ventriculus cranially and to the right. Visualise the bursa/remnant by moving distal colon to the right. The bursa will have regressed in sexually mature birds. Fixed bursa should be taken in younger birds.
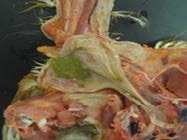
8. Remove the heart
Remove the heart at base (collect a fixed and fresh sample). Examine the dorsal air sacs once the heart is removed.
9. Cut the base of the oesphagus
Sever the oesophagus just cranial to liver. Grasp the oesophagus firmly then reflect liver/gut caudally, cutting the mesentery – this will leave the kidneys and reproductive organs in situ.
10. Retract the gastrointestinal tract to expose the reproductive tract
The spleen is present on the newly exposed, dorsal surface of the ventriculus. Sample the liver and spleen for fresh and fixed samples.Cut the colon distally. Remove the entire gastrointestinal tract and collect fixed samples of the duodenum and pancreas, jejunum, ileum, colon and caecum.
11. Anatomy after removal of the reproductive tract
If gut content is abnormal (very fluid, reddened etc), collect a fresh sample or swab.If toxicity is suspected, sample fresh proventricular and ventricular content.A fresh faecal or distal colon sample can be used to check for enteric parasites like coccidia.Sample the kidneys (fresh and fixed) and reproductive tract (fixed/fresh ovary and oviduct).
12. Gently peel the lungs from the rib cage
Grasp the caudolateral edge of the lung and apply traction medially. Incise or blunt dissect between the lungs and ribs to remove the lungs. Note the lungs are normally closely moulded to the ribs. Sample the lungs (fresh/fixed).
13. Open the crop and oesophagus
Check for exudates/ plaques that may indicate Trichomonas or Candida infection or hypovitaminosis A.Check the crop content as a clue to recent food intake.
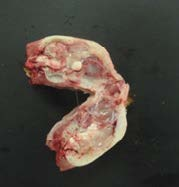
14. Location of larynx
Examine the upper respiratory tract and alimentary tract.Examine the larynx and trachea for caseous exudate of infectious laryngeotracheitis (ILT). Sample both fresh and fixed trachea.Examine upper respiratory and alimentary tract for plaques (fowl pox).
15. Swab the sinuses for exudates
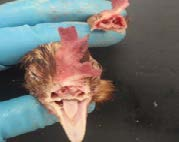
Remove the head with the secateurs. Cut across the upper beak/nares.Examine the sinuses for caseous exudate – swab for bacteria and/or Mycoplasma (chronic respiratory disease).
16. Brain exposed for sampling
Skin the head and remove the lower beak. Split the skull to expose the brain by placing a heavy knife or cleaver on the midline.Swab or shell out half the brain for a fresh sample.Fix the skull with remaining brain for histopathology.
Remember: Sample lesions if not included in the samples mentioned above; fresh and fixed samples are ideal if lesions are large enough.
For more information, please contact the Animal Health Laboratories.