Equipment required
- standard post-mortem kit including boning and skinning knives, scissors, scalpel blades, forceps, laboratory submission forms, permanent markers
- dry swabs, swabs in media, specimen jars for individual fresh samples, large containers for pooled formalin fixed samples
- large pruning secateurs to cut through ribs and jaw bone saw, small axe and hammer for brain removal
- personal protection equipment – overalls, gloves, mask, knee protectors.
Post-mortem approach
- Observe, describe and photograph lesions found during the post-mortem.
- Where possible, sample transitional zones from healthy to diseased tissue for histopathology.
Laboratory samples
Basic sample set
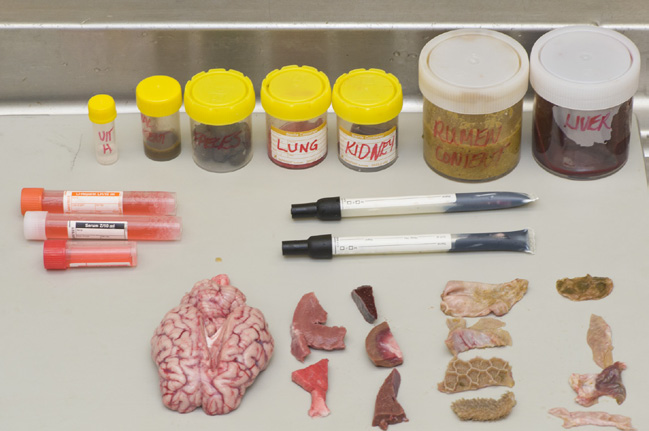
A basic sample set of blood, fresh and fixed samples is sufficient to diagnose common endemic diseases present in Western Australia.
Collection from recently dead animals (within 24 hours)

If live animals are not available to collect blood samples, collect vitreous humour from the posterior chamber of the eye for calcium and magnesium testing.
1. Expose the thorax and abdomen

Lay the animal in left lateral recumbency. Reflect the right forelimb and hindlimb. Carefully incise abdominal muscles to expose the abdominal organs without rupturing the intestine or forestomachs. Using rib cutters, cut the rib cage along the ventral and dorsal aspects to expose the thoracic contents.
2. Expose the oral cavity

Extend the excision up the neck to the chin. Using rib cutters, cut throughout the mandibular symphysis to expose the oral cavity.
Check for loose teeth, abscesses, injuries, erosions and vesicles.
3. Dissect the neck

Hold the tongue and dissect through the hyoid bone joint to release the pharynx and larynx. Continue dissecting the oesophagus and trachea down to the thoracic inlet.
4. Open the trachea

Using scissors, cut down the trachea extending along the major bronchi into the lungs. Check for the presence of lung worms.
Evidence of excessive froth may indicate left heart failure or hypoproteinaemia due to parasitism or inanition.
5. Sample the lungs

Collect a 1 x 2.5 centimetre (cm) section of lung tissue into formalin. Pool all fixed tissues.

Collect a similar sized piece of tissue fresh for bacteriology. Chill fresh tissues intended for bacteriology as soon as practicable to inhibit any overgrowth of bacterial contaminants.
6. Dissect the heart

Make two transverse sections (1cm apart) two-thirds of the distance from the apex of the heart.

Examine the A-V valves through the exposed ventricles. The aortic valve and pulmonary artery can be examined by dissecting down the great vessels into the heart.

Trim a 1cm slice of heart into a ‘T’ section that includes both left and right ventricular free wall and interventricular septum and place into fixative.