Landholders have a legal obligation to fence their property. Local government authorities (LGA) can provide some basic guidelines and minimum fencing requirements.
Generally, the cost of a boundary fence between private land is shared equally between both parties. Boundary fences between private land and the Crown are the responsibility of the landholder.
Creating boundaries
Whether replacing an existing fence or erecting a new one the first step is to decide on the most appropriate fence for the job. Fences can be divided into two broad categories — conventional and electric.
Conventional fences use prefabricated rolls, plain wires or barbed wire to create a physical stock proof barrier. Electric fences rely on a psychological barrier created by an electric shock to prevent stock crossing the fence.
The most appropriate fence design will depend on a number of factors:
- The type of animal needing to be kept in or out - different animals have different fencing requirements. Cattle for instance place much higher pressures on fences than sheep.
- Whether the fence is an internal fence or boundary fence - boundary fences may need to be sturdier than internal fences. Barbed wire may be recommended for boundary fences.
- The topography of the site - does the fence pass through gullies or up steep slopes and other issues such as whether the fence will have to withstand floods or fire.
Other landholders and local fencing suppliers can help determine the most suitable fence for your application.
The make-up of a fence
A fence consists of three main elements:
- strainer assembly at either end
- intermediate posts
- droppers and wire stretched tight between the strainers.
Strainer assemblies
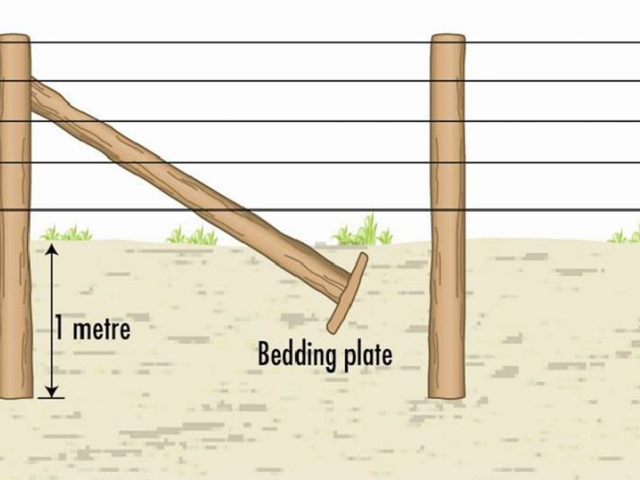
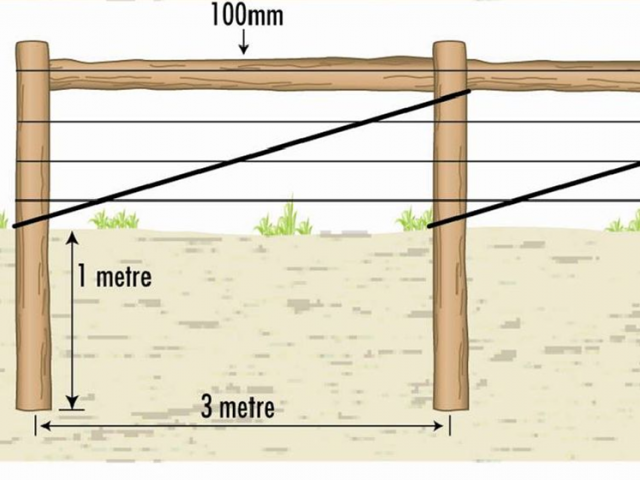
Strainer assemblies are the most important part of any fence. Their job is to transfer the tension in the wires to the ground.
There are two main strainer assembly designs - the diagonal stay and the box.
Intermediate posts and droppers
Intermediate posts perform two functions; to guide the line wires off the ground at the correct spacings and, to some extent, provide lateral resistance to pressure by transferring it into the ground.
Droppers, which are suspended in the fence, maintain the vertical wire spacing and spread any lateral pressure onto all the wires.
Wire
Three main types of wire are used in fencing; prefabricated rolls, plain wire and barbed wire.
The most expensive - prefabricated rolls - are a quick and easy way to erect a fence. They can be used in conjunction with plain or barbed wire.
Wire comes in many thicknesses (gauges) and tensile strengths. A fencing material supplier can help you decide what is the most appropriate gauge for your fence.
Material types
End assemblies can be built from steel, concrete or timber (treated or natural).
Treated timber is a popular choice because of its resistance to termites. It is light and can easily be cut to length in the field.
Steel is more expensive but is an excellent alternative in high fire risk areas. Steel posts can be installed quickly by hand without the need for a tractor and can be galvanised to prevent rusting.
Concrete posts need to be prestressed to perform well but they can still be affected by fire and are very heavy.
Putting it all together
Planning is essential. Mark out the line of the fence, keeping it as straight as possible to minimise pressure points. Every corner means another stay assembly, which is more expense.
Install end posts at least one metre in the ground. For maximum strength the post needs to be driven into the soil using a pilot hole as a guide. This requires a tractor powered post-hole digger and driver.
Alternatively the holes can be dug by hand and the soil rammed back around the post using a crowbar. In some unstable soil sites it may be worth considering concreting the posts into the ground.
To get all intermediate posts aligned between the two end posts use a helper and an optical aid such as an automatic level.
Another method is to strain a sight wire or the top wire between the two strainers, shaking it to make sure it is lying straight on the ground just as you might do with a stringline.
Put in the intermediate posts, if using steel posts these are driven in using a post knocker.
Concrete or wooden posts will need to be dug in or driven in using a mechanical driver.
Attaching wire
Prefabricated fences are tied off onto one of the end posts and rolled out to the next post. If the distance is greater than one roll, join it to another roll and continue until the next post is reached.
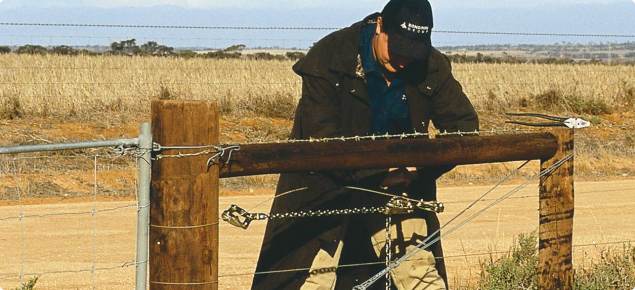
When straining up prefabricated fences it is wise to use a multiwire strainer. This grips all the wires in the roll simultaneously ensuring an even tension.
The strainer is fitted to the wire a few metres before the second strainer and tension applied. This can be carried out with a tractor or four-wheel-drive.
After the first strain, the roll needs to be lifted and shaken along its length to free it from any obstructions on the ground.
Judging when the correct tension is reached can be tricky but there are several tools on the market which can help.
With prefabricated wire one simple method is to note the change in crimp shape in any of the line wires. When the crimp is half flattened the tension is generally sufficient.
When no crimp can be seen, then the tension in the wire is too high and needs to be reduced.
The loose ends of the line wires can now be tied off on the second end assembly and the tension on the strainer released.
A commonly used method of straining plain and prefabricated wire is to use a wire joiner as a tensioning device that fits permanently on the fence allowing the wire to be restrained at a later date.
To join rolls, use wire connectors and pretension using a multiwire strainer. The multiwire strainers are removed from the wire and the end tied off on the second end assembly.
Then, using single wire strainers, the individual line wires can be tensioned at the join of the rolls.
Using plain wires follows a similar process except that the wires are rolled out and strained one at a time.
When using steel intermediate posts it is important to not run the wire through the holes in the post — tempting as it may be. This will damage the galvanised coating on the line wire, shortening the life of the wire.
The final job is to tie off the line wires onto the posts and droppers.
Remember when using wire ties on steel posts that one side of the tie needs to go under the line wire and the other side over the line wire to hold it securely in place.
The finished product should be a quality fence capable of managing your livestock and preserving a healthy relationship with your neighbours!
What you will need
To construct a fence you will need the following:
- a helper
- pliers
- posts (strainers and drop posts)
- wire
- post hole-digger
- wire-strainers
- crow bar
- safety glasses
- gloves.
Tying the knot
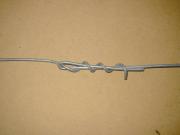
Traditional knots are the cheapest method of joining wire but some knots are better than others. The strongest knot for all types of wire is the figure eight (below), but it is not suitable for all applications.
Tying the knot requires some extra length in the wire, but the wire will usually slacken by about 50mm after wire strainers are removed so this makes the knot unsuitable when straining short lengths of fencing.
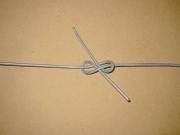
A better knot in this situation is the double loop knot (below) which is easier to tie but can reduce fence strength significantly.
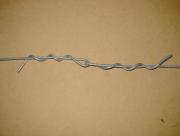
Another option is the pin and loop knot (below). While more complicated to tie this knot is stronger under tension than the double loop.
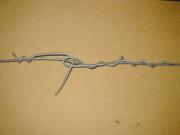
The Donald knot (below) is stronger than the double knot, but needs to be tied tightly to avoid unravelling under tension.
